Painting Kitchen Cabinets With Chalk Paint is easy and can transform a room on a budget.
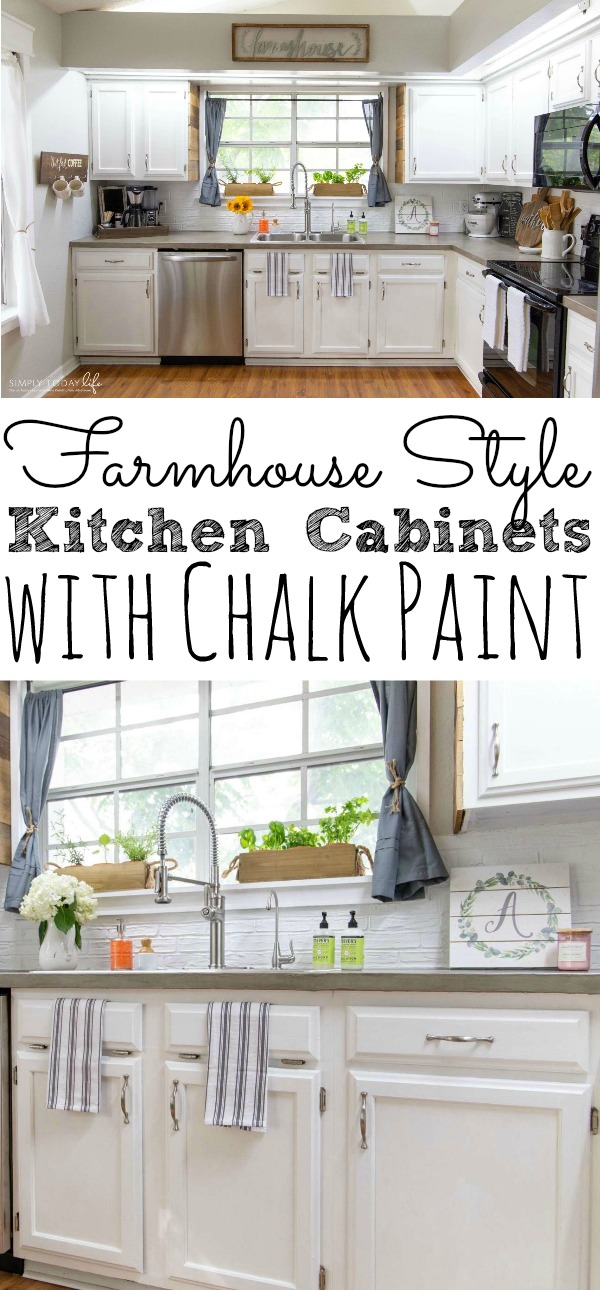
Painting Kitchen Cabinets With Chalk Paint
Have you ever lived in a home that you just love, but know that some updating needs to be done?
I know the feeling oh too well. My husband knows I’ve been dying to get my hands on our 1980s kitchen cabinets since we moved in.
Sometimes, purchasing new cabinets just isn’t in the budget and I’m all for budget-friendly DIY!
That’s why painting my kitchen cabinets with chalk paint was the perfect choice for me.
I have been waiting to redo our kitchen since we moved into our home 14 years ago.
Painting my kitchen cabinets with chalk paint literally took it from ’80s drab to farmhouse fab.
This post contains some affiliate links for your convenience
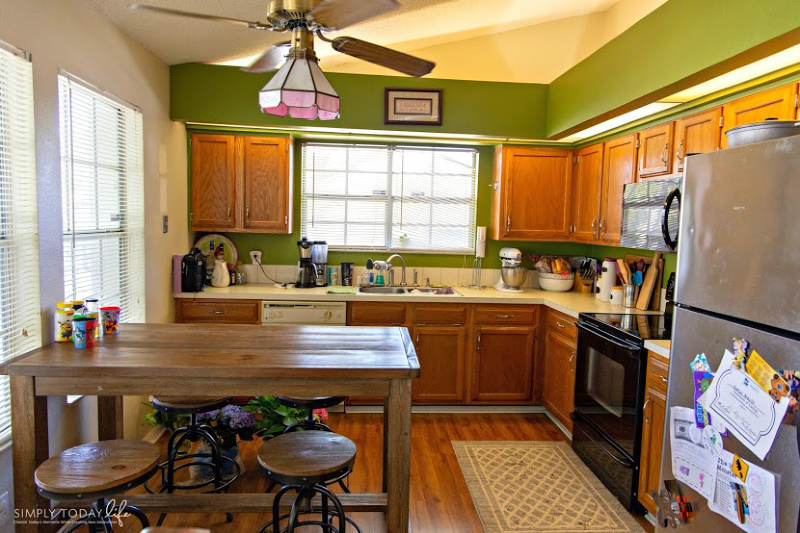
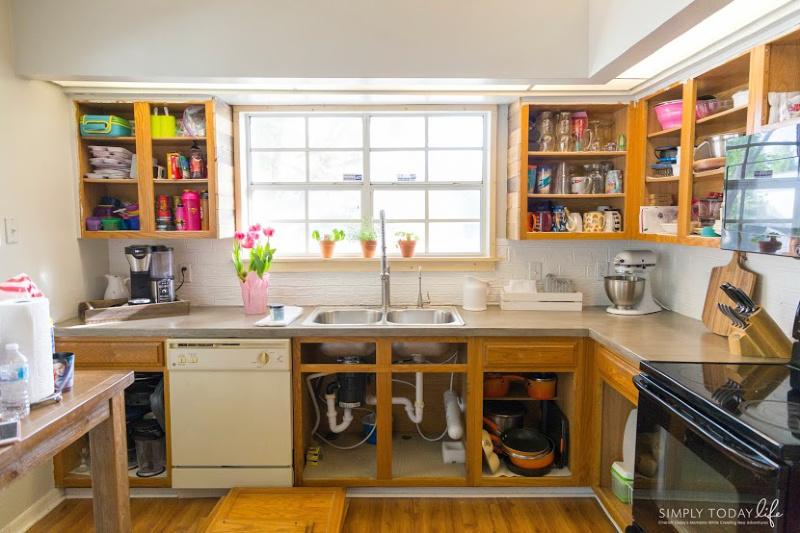
Before Photo
DIY Farmhouse Kitchen Cabinets
I knew that I wanted to create a Farmhouse look for our kitchen renovation.
It’s been a dream of mine to walk into my white beautiful kitchen since we moved into our little home.
I just needed to find the perfect materials, paint, and color to make my farmhouse kitchen dream house a reality.
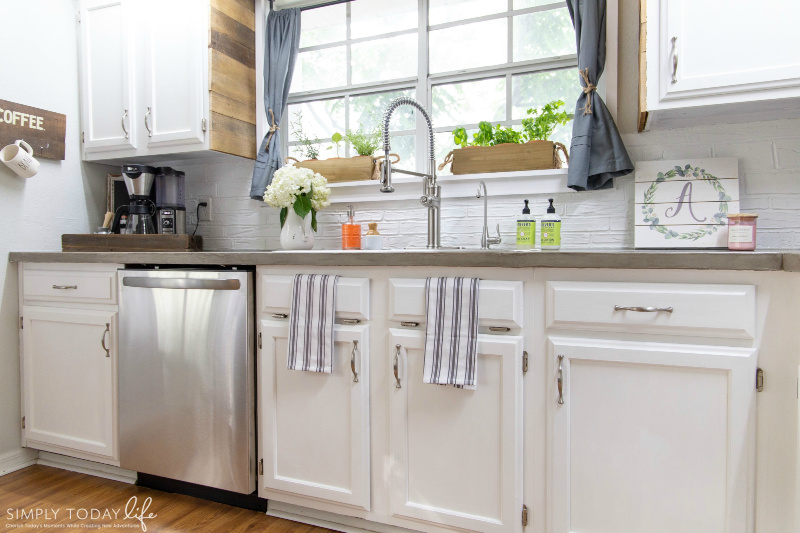
No Sanding Or Priming Kitchen Cabinets
Another great thing I love about using chalk paint is that there is no need to sand or prime before painting furniture.
This is something I’ve heard for all chalk paint, but I’ve put it to the test with Dixie Belle Paint.
I wanted to get more of a clean, bright, and farmhouse look in my kitchen, so I chose Dixie Belle’s Cotton paint color.
What better way to transform my kitchen into my dream farmhouse kitchen than the easy way?
Plus, I was able to keep the cost down by not having to purchase materials to sand or prime my cabinets.
Tip: If you feel as if you need to sand or prime your cabinets, by all means, go right ahead. It’s not going to hurt the process at all.
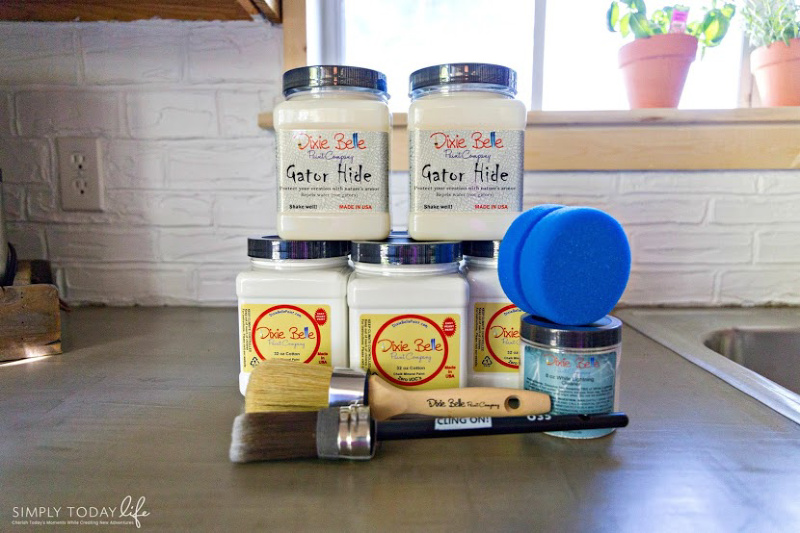
Materials Needed To Paint Kitchen Cabinets
I compiled a list of materials that I used to redo our kitchen cabinets.
Some of these materials you most likely will already have at home if you’ve done any home renovations.
The rest you can easily order online on Amazon, straight on the Dixie Belle website, and your local hardware stores.
- Chalk Paint, your color choice, I used 2 of the 32 oz. in the color Cotton
- Brushes
- White Lighting Cleaner
- Gator Hide
- Blue Sponge
- 2 small buckets or spray bottles
- 2 washcloths or small towels
- Painters tape
- Screwdriver
- Small baggies to keep all hardware
- Painter’s pyramid stacks (holds cabinet doors away from the floor to dry)
- Towels or sheets to cover countertops
Below you will find all of the materials I used straight from Amazon.
How To Paint Kitchen Cabinets With Chalk Paint
Chalk-painted kitchen cabinets look absolutely beautiful and although I’m going to be sharing a lot of steps try not to get too overwhelmed.
I’m telling you, it’s easier than it looks.
In fact, I re-did this entire kitchen all by myself. My husband helped me out when I couldn’t get a screw out here and there from the cabinets.
I mean, they are from the ’80s and haven’t been touched since the house was built.
So I will say, if you’ve been thinking about painting kitchen cabinets with chalk paint, then do it!
- The first thing I did was take my cabinet doors off along with all the hardware. Believe me when I say that you will thank me for doing this. Yes, it’s a pain and tedious, but the painting will be so much easier and cleaner to do. Especially if you are going to re-use your hardware as we did.
- Now, if you are going to reuse your hardware, make sure to clean them or spray paint them. It will give the cabinets a nice shiny new look.
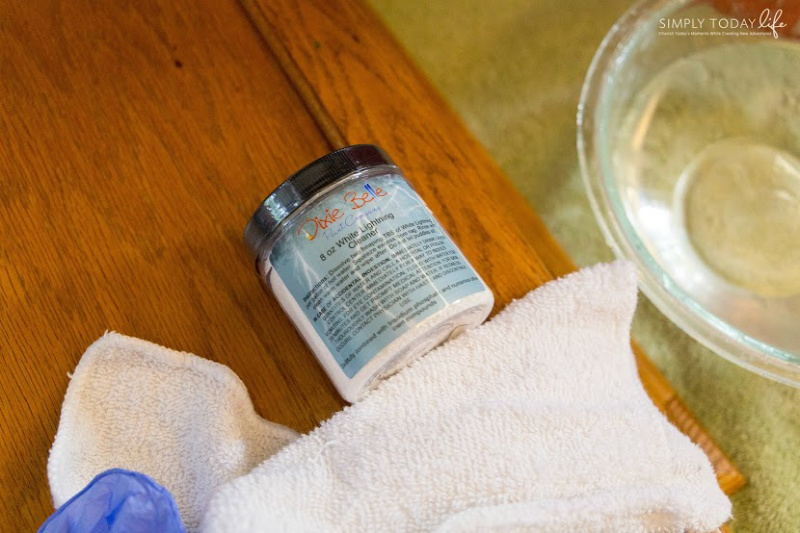
- Once all the doors and hardware pieces were off I used the White Lighting Cleaner to clean all of the cabinets and doors. This helps give the paint a nice clean surface for it to stick on. Plus, you don’t want any extra dried pasta on your cabinet doors.
- Make sure to get into the cracks of your cabinet door. Especially if they are as old as ours are.
Tip: Use a washcloth to clean the cabinet area and the cabinet doors. If you have cracks or smaller areas like ours use a toothbrush to really get the dirt out.
Don’t skip cleaning your kitchen cabinets and doors. I know you want to go straight into painting, but it’s not going to be worth all of that work if you skimp on the important steps.
Cleaning is a major part of making sure the chalk paint goes on the furniture easily and beautifully.
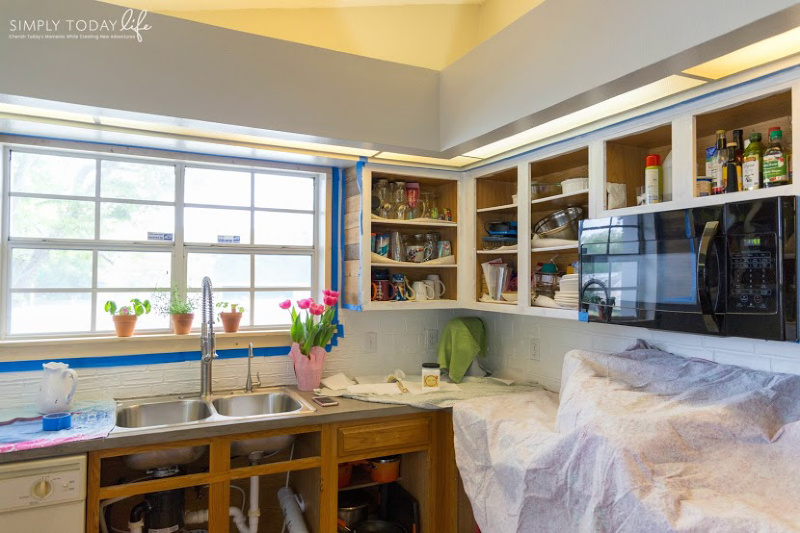
With chalk paint sanding and priming is not necessary.
I decided to prime my cabinet doors because I wanted to make sure that the white paint lasted a long time.
Especially since my girls are getting older and starting to make more of their own meals.
I didn’t prime the cabinets though, just the doors.
Again, this wasn’t necessary but just an extra step I wanted to do so that the white color would last longer.
If you look at the photos below you can’t even tell a difference between where I primed and where I just painted over the cabinets.
- If you are priming, make sure to allow all of the primers to dry completely overnight. This is very important! If you are not priming just start painting your cabinets with your chalk paint.
- Once my primer dried (I waited 24 hours), I painted all the cabinets and cabinet doors with my Cotton Dixie Belle paint.
Tip: There’s no need to wait long to do a second coat of your Dixie Belle.
The process was easy and the paint dries quickly, so by the time you finished painting the first coat, you can go ahead and start a second coat.
This helped the process go a lot smoother and faster than painting with regular paint does.
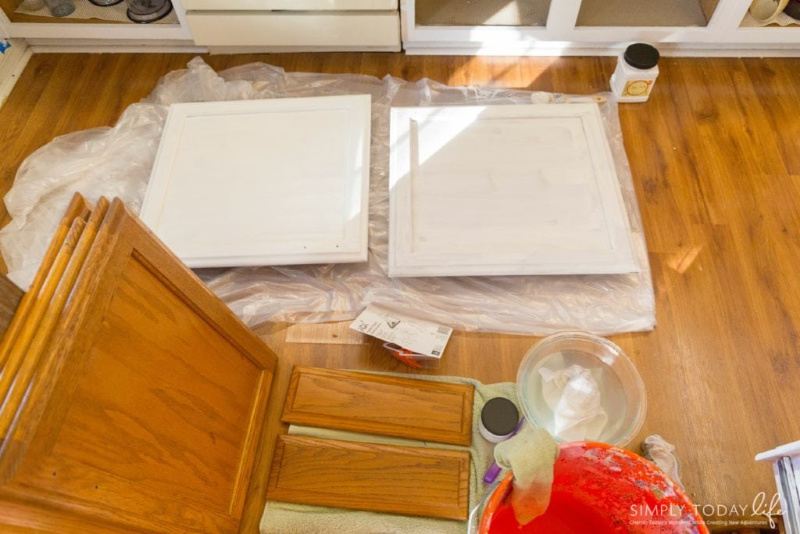
I knew with our darker kitchen cabinets I would have to do more than one coat of paint.
One of the great things about chalk paint is that it’s very thick and covers the cabinets well.
I decided on two coats for the cabinets and two coats for the cabinet doors on top of the primer.
If you have lighter cabinets you probably won’t need to do two coats.
Tip: One way to make sure you need a second coat is to allow the paint to completely dry. If you can still see your base color on your doors or cabinets go ahead and apply a second coat of paint.
How To Paint Cabinet Doors
Painting doors is not as easy as I thought it would be.
Especially since you have to paint both sides and don’t want to mess up the side you have already painted.
You have to be careful not to scratch the paint off your doors with the chalk paint before you have sealed them.
The easiest I found when it came to painting the cabinet doors at the same time was using painter’s pyramid stacks to keep the cabinet doors off the floor and easier for me to paint.
I suggest two packets as they bring 5 in each pack.
You will need about 2 pyramid pieces per small door and 4 for larger doors.
These little pyramid stacks were a lifesaver in making sure that the cabinet doors were drying quickly and without any streaks or scratches.
Plus, the more you have to use, the more doors you can paint without waiting for the other doors to dry.
The last step in making sure your cabinets are sealed and last a long time is to cover everything with Gator Hide.
This will protect the cabinets from stains, water damage, and fingerprints, and will take away the chalky feel of the paint.
I applied the Gator Hide using their blue sponge.
Tip: Make sure to wash your blue sponge a few times with soap and water. You want to get some of those blue fuzzies off before you start using it on your beautiful cabinets.
Using Dixie Belle’s blue sponge helped with drippings and making sure I was spreading the Gator Hide evenly.
It’s not thick like the chalk paint, so it runs easily.
A little goes a long way!
- Once the Gator Hide dried, I applied two more coats. I wanted to make sure these were sealed perfectly, especially with two little girls running around.
Update: I highly suggest the Gator Hide seal your cabinets! Especially if your family loves pasta nights.
My daughter spilled a bowl of pasta that had pasta sauce splatter on the floor, cabinets, and our walls. Anywhere I applied the Gator Hide was easy to clean, my white curtains, not so much!
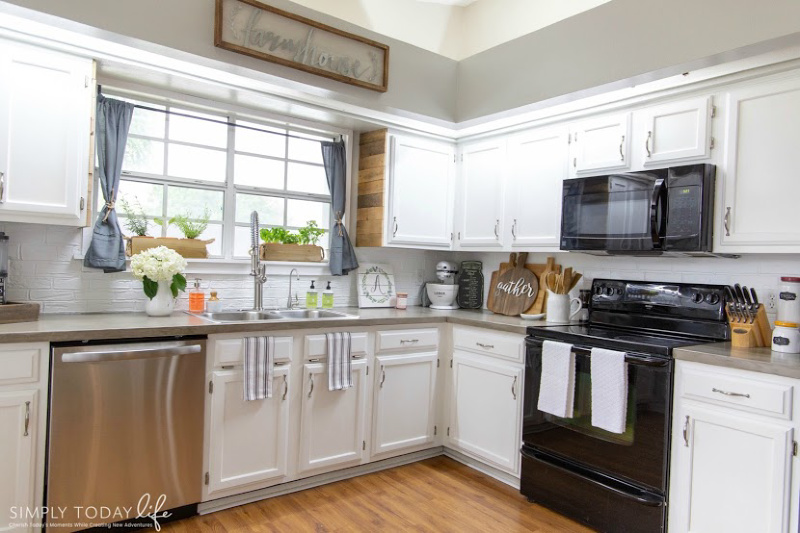
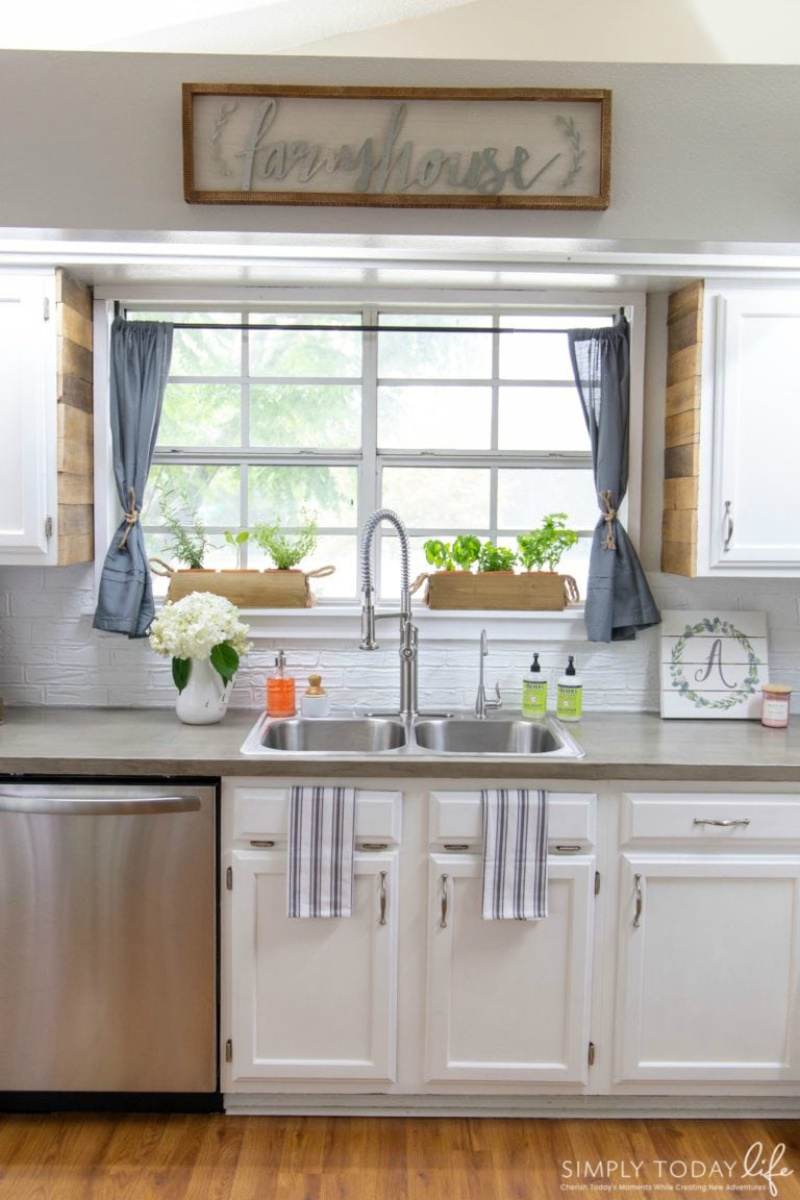
That’s it!
See, painting your kitchen cabinets white with chalk paint is super easy and so worth all of the work you put into it.
Just by looking at the before and after photos you can’t even tell that it’s the same kitchen!
It’s amazing what a little bit of chalk paint, a little work, and a lot of determination can do for renovating your home on a budget.
I can’t wait to share some more projects that I have planned in our home!
Plus, some new DIY ideas I’ve been working with my husband as well.
Also, check out my Instagram stories where I’ve been sharing my budget-friendly DIY farmhouse kitchen idea videos.
Just look for the highlight on my Instagram account that says Chalk Paint.
Chalk Paint Kitchen Cabinet Update
I’m updating this post today February 24th, 2020 because lately, I’ve been getting a lot of questions and emails on how my kitchen renovation has gone and why I’ve not shared anything new when it comes to DIY projects.
First of all, these messages have motivated me to get back at doing some DIY in our home.
Well, in our new home! Yes, as of last June, we have moved from our former 14-year-old home and although it was bittersweet, we are super excited about some new renovations in our home.
You would have thought that I would want to get something newer, but guess what, we purchased another 80’s home!
I think I just like updating old things! In a good way!
I surely miss my old kitchen especially since I had renovated it into my dream farmhouse kitchen, but let me just say that that was the selling point in our home.
Everyone who walked into the house was in love with that little kitchen that I put so much effort and love into.
When we moved out it looked just as fabulous as it did when I first painted it.
This is why I’m planning on redoing the kitchen in our new home and transforming it into my new farmhouse dream kitchen.
Plus, sharing how I created my concrete countertop!
You Are Also Going To Love:
If you loved this Painting Kitchen Cabinets With Chalk Paint DIY, then you will also love the following home renovation DIY posts I have put together for you:
Will you be painting your laminate kitchen cabinets with chalk paint?


This looks gorgeous! We have Cherry cabinets that are now in need of refreshing. This would be perfect for our kitchen.
Oh you would love it!! Dixie Belle paint was so easy to use and they have to many colors to choose from!! So much easier than I thought it would be!
Did you put anything over the top of the paint?
Hi Ann! Yes, after I let the paint completely dry I used a small sponge to apply Dixie Belle Gator Hide. I did a few coats of this. It repels dirts, water, dirt, moisture. Making it easy to clean. Especially since the cabinets are white and I have little hands constantly opening and touching them. 🙂 Hope this helps!
What primer did you use on the cabinet doors?
Hi Roz! I used Zinsser 123 Primer and I purchased it at Home Depot. It covers really well!
How are your cabinets holding up? Are you noticing chipping on the cabinets? I painted my cabinets with a different brand and sealer. I have noticed some chipping on the high traffic cabinets after 3 months. I am considering covering them with Dixie Belle Gator Hide. Do you think that will help with the chipping.
Your kitchen looks beautiful. It is amazing how paint can transform a room.
Thank you!
Dana
Hi Dana!
Thanks for stopping by! They are holding up fantastic, definitely no chipping going on. Even with my two young girls constantly opening and closing cabinet doors. I was a little bit worried especially with some of the doors hitting the wall when they open them, but nothing has chipped! I really like how the Gator Hide still looks and has kept the paint. We accidentally got pasta sauce on the cabinets one day and I freaked out, but it only took a wet rag for it all to clean off easily! I’ve also used it on our front door paint that I just redid to seal it from rain and outdoor moisture. So far so good too! I think it would probably help your paint, not chip.
Thanks so much! We love how it turned out and can’t wait to do the rest of our home!
Hi! This looks fantastic. Excited to start mine tomorrow. How long do you let the doors dry before you re-hang them?
Hi Melissa! I allowed at least 24 hours before hanging them. I wanted to make sure they were completely dried 🙂 Have fun! Can’t wait to see your end results!!
Hi I am wanting to repaint our kitchen cabinets. Our kitchen is about the same size. How much paint did you buy for this project?
Hi Heather! Oh, how exciting! If I’m not mistaken I used about 5 total to cover the cabinets and the inside of it. It’s thicker than regular paint so it will cover more while needing less. I would start with less paint because you can always order more, but it’s always great to have a little extra for touch-ups or stains you can’t get off. Hope this helps!
How much paint did it take to do your kitchen? How much of the Gator Hide did it take?
Your kitchen looks wonderful!!!!
Thank you so much, Kelly! For the Gator Hide one large container was enough and for the paint, I think I used two of the large containers. I wanted to make sure that I covered as much as possible, but the paint is thick so you won’t use as much as you think you would.
When you say you used to two large containers, what does that mean? A gallon, or the 32 oz size? In another comment you said you used 5. Like you literally said I believe I used 5. 5 what? 5 containers, 5 gallons?
I’m confused on the amount you used. I have a similar sized kitchen so I’m curious.
Also, I noticed you put wood panels on the sides by your sink, did you do that because the paint wouldn’t take?
I have the same cabinet but the sides of them and my island are a fake “wood” material and I was wondering if the paint would take the same.
Hi Melissa! At the time Dixie Belle did not sell the gallon sizes, so I used 2 of the 32 oz size containers to paint the doors and the cabinets. I always suggest having a little extra on hand just in case for later on too. I think the 5 I was referring to are the pyramids that I used to lay the doors on so it makes it easy for painting. I added the pallet wood on the side of the cabinets to tie in the look of my island table that we built. I wanted to add some of the wood element to the cabinets. I hope this helps! 🙂 Thanks so much!
can u use wax to darken the corners and still use gator hide over that?
I haven’t tried it, but I don’t see why not. It should just create that film to protect it. I would maybe do a small corner where it’s not noticeable to try out first. But I think it would work just fine 🙂
Will the chalk paint cover high gloss polyurethane cabinet doors on birch laminate doors. I really do not want to have to sand 20 doors and 7 drawers + the cabinet bases. I love the look of your kitchen, also considering cotton.
Thank you so much and I don’t blame you! LOL! Because my kitchen cabinets were so old I didn’t sand them down, but I’m about to do my bed frame which is cherry wood and high gloss as well. I will most likely sand it, prime, and then paint over just because I don’t want to have to do it later on if it shows through. But there’s not much to paint. What I would do is do one section inside of a door cabinet. I would paint with the chalk paint allow to dry an hour or so and then paint again. See what happens. This would give you a good idea if you have to sand or prime. Hope this helps! And share with me when you are finished, I would love to see! You can tag me on any social media with @simplytodaylife 🙂
How long did it take for the Gator hide to cure before it was safe to use around water?
I let cure for at least 48 hours. It should only take a few hours because it dries very quickly, but I wanted to make sure to give it time. I would do at least 24 hours 🙂 Hope this helps!
We’re your cabinets laminate? My doors are real wood, but the cabinets are laminate. What would you suggest for how I should go about painting them?
Hi Sue! Yes, my kitchen cabinets are the same. The doors are real wood, but the cabinets are laminate 🙂 I’ll do an updated post soon so you can see how they are holding up, but they are fantastic! So easy to clean too with the Gator Hide seal!
Jay and I are considering doing our kitchen! When we’re ready, I’ll be back to ask lots of questions!
Please do! It’s so worth it and still looks amazing!!
Hi Victoria,
Your cabinets look beautiful! Can you still see the wood grain showing through the paint?
Also does the gator hide give them a satin sheen or do they look like a flat finish?
If I want a satin look I wonder if I should do the satin clear coat after painting with the cotton and then do the gator hide?
Hi Cheryl! Thank you so much!! It’s definitely my favorite part of the house!
No, I cannot see the wood grain showing at all. It gives it a slight sheen, not much though. Which I like because it keeps the Farmhouse feel to it. But it’s perfect for when the kiddos have splashed spaghetti sauce all over the white cabinets! It came right off! LOL!!
Oh, you could definitely try that and see how it looks! Maybe do the inside of one of your cabinets to see how it all looks. Everything dries up so fast that you will be able to tell within a few hours how everything looks together! Let me know how it works out!
I’m planning to refinish a coffe table and 2 end tables with Dixie bell paint after reading so many great reviews. Looking for an oatmeal or greige color – any suggestions?
Hi Diane! So sorry I’m just seeing your comment! Hope you were able to choose a color! I love Dixie Belle so much and planning on refinishing some furniture myself in a gray color soon. I will let you know what I choose. Would love to know if you decided on a color?
Your counters look great! Did you paint them?
Thank you so much, Sandra! No, they are concrete! I have a DIY post coming soon to share exactly how I achieved this look! I loved how they turned out!!
Can i ask what color grey your walls are? Thank you!
Hi Sharon! Sure thing! It’s Icy Avalanche from Sherwin Williams HGTV 🙂 It’s my absolute favorite!!
How do you recommend not getting streaks in the clear coat? That seems to be an issue I keep having… thanks!
Hi Mary! Using a very thin layer of the Gator Hide is the trick with the blue sponge. The sponge evenly distributes the clear coat without leaving streaks. Hope this helps!
Did you paint the inside of the cabinets as well? Just curious.
Hi Eileen! Yes, we did! I actually wanted to cover the back of the inside with wallpaper, but never got the chance before we moved. I’m about to do the same thing with my kitchen in our new home.
I am wondering about your back splash. I really like it, can you tell me what it is?
Hi Michelle! Thanks so much for asking. It’s actually a brick wall faux backsplash I made myself. I have a DIY coming up soon on how to do it. I’m so glad you like it! It’s one of my favorite parts of the kitchen and I’m hoping to do the same again soon in my new home.
Hi Victoria
Can you tell me if this process would work with laminate doors and cabin are? I’m definitely motivated to paint mine before Christmas!
Hi Liz! Oh, for sure! Our cabinets were laminate and they turned out phenomenal! In fact, I’m planning on doing them in the house we moved into recently as well. Have fun!
I am so happy you did this blog tutorial! So many people say to stay away from chalk paint with kitchen cabinets, but I have been wanting to try so bad. We just bought a house with the same oak cabinets and I am going to be painting them exactly how you did. I am going to do a scuff sand just to help make them a little more durable. I have read this multiple times and will use it to guide me through my upcoming project! Wish me luck with a 19-month-old!!
your kitchen is beautiful. My kitchen is the same layout but wider. My cabinets are all painted in that same 1960s green. Im getting ready to repaint mine but I will be using a soft gray. Chalk paint is out of my budget but I have interior paint I will be using. I cant wait to get it all done. Thanks for the inspiration.
JoAnn
Oh, soft gray will look beautiful! Enjoy your new kitchen update!! Thank you so much!